Project Completed: October 04, 2024
Services: Concrete Foundation, Excavation Services, Topsoil Delivery & Installation

Concrete Garage Floor Extension in Bergen, New York (Genesee County)
Project Overview
A thoughtful homeowner in Bergen, New York (Genesee County) reached out to us through Google looking for a reliable contractor to install a concrete garage floor and level some spots in his yard. His main goal was to have a clean, strong garage floor extension that ties into the existing garage structure and to fix the low, soggy areas in the yard. He also needed a small trench installed to improve drainage near the side of the property.
Here is the Existing Condition of the Property:
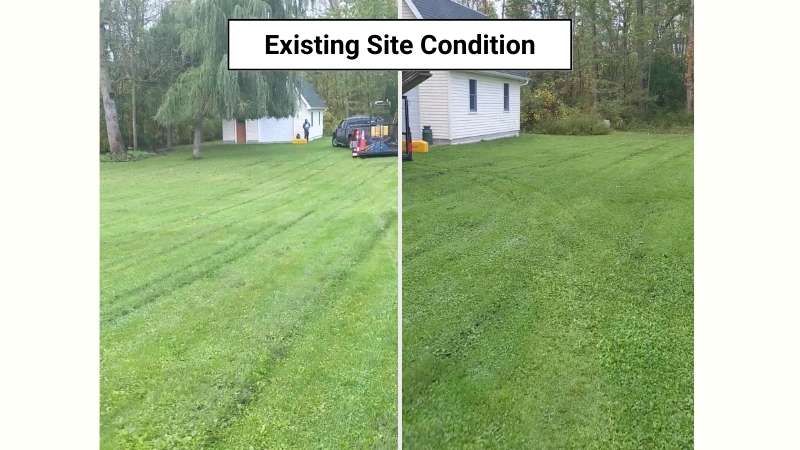
Existing Site Condition
How We Completed the Project

Concrete Garage Floor Site Plan
Excavation for Foundation
We began the project by excavating the area for the new garage floor extension. The space measured 24×24 feet with a 6×24 apron, and we excavated to a depth of 12 inches to allow for a strong concrete base with a haunch footer.
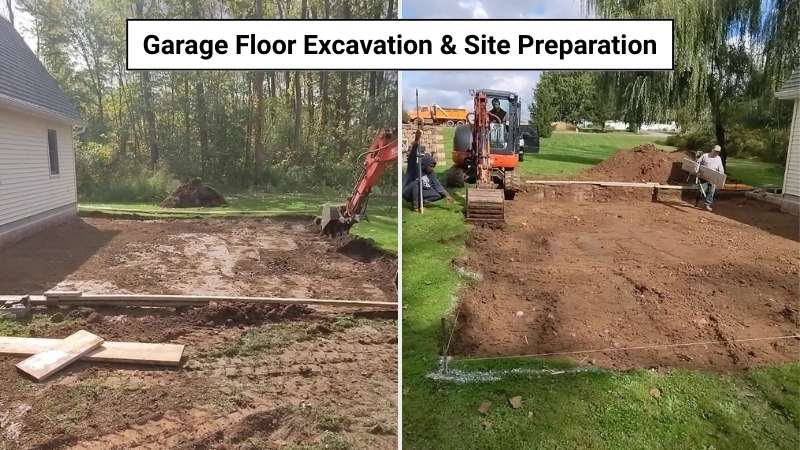
Garage Floor Excavation & Site Preparation
Stone Base, Formworks and Rebar Installation
Once excavation was complete, we laid down and compacted 20 tons of #1 crusher run stone. This was spread to a 6-inch thickness. We also set up the formworks for the garage and apron.
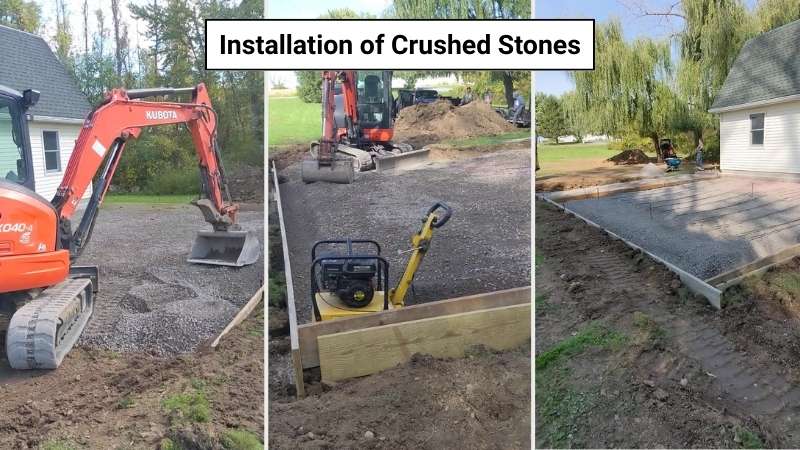
Application of Crushed Stones
To make sure the new garage slab ties firmly into the old one, we drilled 24 holes into the existing slab and inserted #4 rebar (1/2-inch) 8 inches deep. Each rebar extended 24 inches into the new slab with a 12-inch spacing to distribute the load evenly.
We poured 17 cubic yards of 4,250 PSI fiber-reinforced concrete at a thickness of 6 inches. Around the foundation edges, we installed a 12-inch haunch footer for added support. The slab surface was given a smooth finish, and we included 3 expansion joints in the apron area. Four days later, we returned to remove the formworks and cut control joints to help manage any natural cracking.
The concrete garage floor after finish
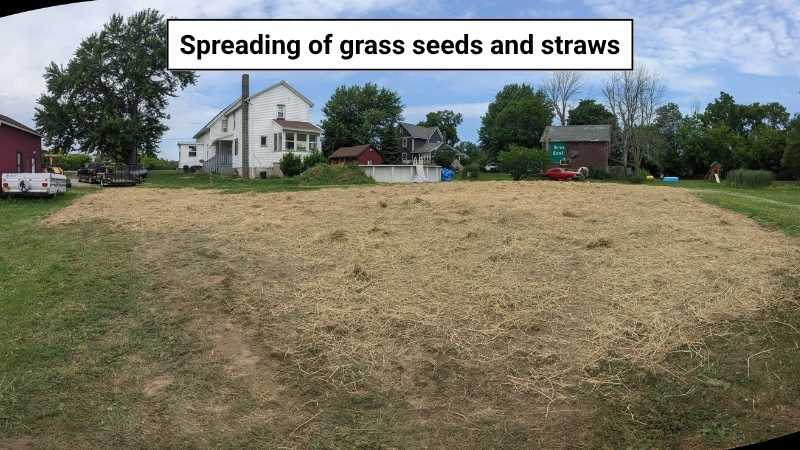
Topsoil Work
After pouring the concrete, we also addressed the low spots in the front yard. We spread about 30 yards of triple-screened topsoil at a 4–5 inch thickness across the low-spot areas. Everything was graded evenly for proper drainage.
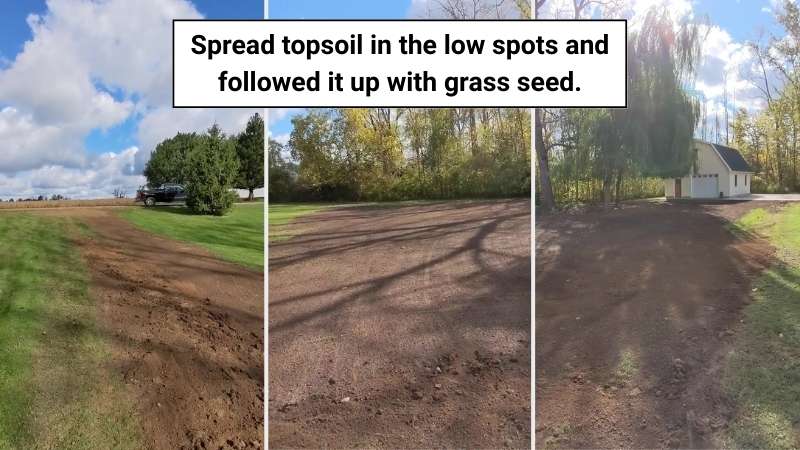
Topsoil were spread in low spots and followed it up with grass seeds.
Backfilling and Drainage Work
After the concrete set, we backfilled the edges for a clean look. Then we created a small trench on the side of the property to help water flow away from the house and prevent pooling.
h2>Project Insights
This homeowner now has a clean, solid concrete garage extension that’s blends right into the old one like it was always there. Plus, by addressing the low spots with quality topsoil and building a simple trench to guide water runoff, we helped prevent future drainage issues in the yard.
If you’re also dreaming of expanding your garage or fixing soggy areas in your yard, give us a call. Our Concrete Installation Services are designed to give you reliable, long-lasting results. We also offer Topsoil Installation Services to help correct low spots and improve lawn health and drainage. Want to build a slab that blends well and drains right or finally fix those trouble spots in your yard? Contact us today and let’s talk about what’s possible for your property.